Just how to delete game data on heavy steam?
The Steam Cloud offers a very easy as well as transparent way to conserve your game data on a remote storage space system. The documents specified in the Auto-Cloud arrangement or if they are written to the disk will instantly be reproduced to the Vapor cloud servers (utilizing the Cloud API) after the video game exists.
Vapor
This is especially valuable if the user changes his computer system. The video game development will certainly be resumed by either the Cloud API or reading straight from the disk. The documents will certainly be instantly downloaded before the game is released as you would have currently entered your Steam qualifications. The primary task of the Heavy steam Cloud is to make sure that all the data are integrated throughout all the computers an individual is making use of.
Customers have the option to disable the whole Cloud synchronization present in the Steam Settings in the client. Customers additionally have the versatility to disable the Cloud synchronization per video game. However prior to proceeding with the remedies, update the Vapor client to the latest construct.
What Are the Different Approaches of Utilizing the Vapor Cloud?
Steam supplies two different techniques to utilize the Heavy steam Cloud.
To begin with is the Heavy Steam Cloud API. The Cloud API gives a collection of functions that permits you to directly integrate the Heavy steam Cloud into your video game. The Cloud API additionally does the task of separating individual Vapor individual files from each various other as well as additionally provides far better control over the Steam Cloud overall.
The second is the Steam Auto-Cloud. This function was primarily designed for tradition games where it was awkward the Cloud API. It is a fast method to start with the Steam Cloud but it does not have the flexibility as well as power that the Heavy steam Cloud API offers.
It is recommended by the designers to utilize the Cloud API rather than Steam Auto-Cloud as it gives much deeper and reliable combination and customization. It allows you to get one of the most out of the Vapor cloud.
How do I Deal With a Vapor Cloud Conflict?
A Steam Cloud conflict happens when the Heavy steam Cloud web content doesn’& rsquo; t suit with your neighborhood video game data stored on your hard drive. This can happen on the equipment you were utilizing at that time or it may have happened in another equipment formerly. Since the documents was customized in two various locations without the synchronization in between them, Vapor can not identify which file to maintain.
Steam Cloud Conflict
You will certainly most likely pick the documents which was modified most recently. Suggesting the most recent advancements in your game will certainly be conserved. You must very carefully evaluate the information previewed in the window. Meticulously examine the date as well as time of the context and match this to the last time you played a game on Heavy steam. This context can help you in establishing which version to keep.
Keep in mind that playing video games in offline mode will keep your games from syncing as well as this is one of the most possible cause of the Steam Cloud dispute.
Suppose Steam is Incapable to Sync Files to the Cloud?
This mistake shows that Steam might not sync your neighborhood files with the Steam Cloud. It can be a momentary issue that the Vapor Cloud web servers may be facing. You can inspect the Vapor Cloud standing from the Heavy steam web site to make certain that the problem is on their side.
Vapor Was Not Able To Sync Your Documents
If the Steam cloud service is up and also running flawlessly, it suggests the issue goes to your end. You could check your Vapor connection as well as troubleshoot problems. You can additionally check if only you are having issues syncing with the Heavy steam Cloud.
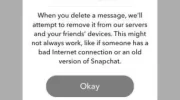
If you neglect the message as well as click on “& ldquo; Play game & rdquo;, it might trigger a possible problem between your neighborhood documents and also the Heavy steam Cloud. It can also lead to lost progression and also video game data.

What If I Lose a Documents or Development After Moving to a Different Computer?
If you are missing your newest progression and have actually ascertained that the game is making use of the Steam Cloud making use of the Settings, it means either Vapor wasn’& rsquo; t able to sync your data efficiently or the sync caused your previous information being uploaded to the Cloud.
It is feasible that your original file or the progression is still on the older equipment as well as was not able to sync. It is feasible if you launch Vapor on that computer system, your progression will show. If it does, it will instantly be updated on all various other devices connected with your Vapor account.
Likewise, lots of games put on’& rsquo; t utilize the center of Steam Cloud. You can examine the game’& rsquo; s main page if Steam Cloud assistance is available. If it isn’& rsquo; t and you don & rsquo; t have accessibility to the older device, it indicates that your progression is shed and also there is no chance to recoup it.
How to Remove Info Stored in Heavy Steam Cloud Servers?
Steam Cloud is utilized to support each of your video game’& rsquo; s advance so you don & rsquo; t shed your progress if you access the video game from any type of various other computer. You can verify that your progression is being saved by the Cloud utilizing the complying with method.
Check if Your Video Game is Being Backed Up.
- Open your Steam client. Open its Setups by pushing the Vapor switch existing at the top left edge of the window and selecting the choice.
- Open the Cloud tab present on the left side of the screen. Check if the alternative “& ldquo; Enable Heavy steam Cloud synchronization for the applications which support it” & rdquo; is inspected. Enable Steam Cloud synchronization for the applications which sustain it
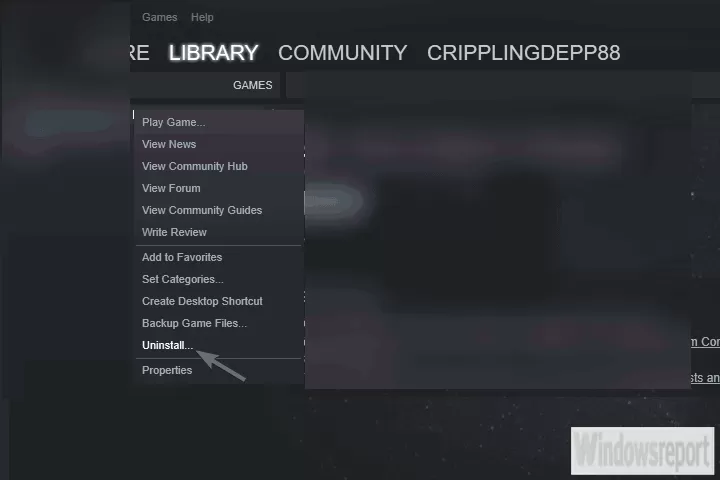
- Next click the Library tab existing on top side of the Heavy steam client. Right here all of your games will be provided.
- Right-click on the video game as well as pick Features. Then navigate to the Updates tab present at the top of the home window.
- Here at the bottom of the home window, you will see a choice “& ldquo; Enable Vapor Cloud synchronization for [game’& rsquo; s name] & rdquo;. Ensure that the choice is checked. Enable Steam Cloud synchronization for the Game
If you have both the options allowed, it suggests that your game is being supported by the Heavy steam Cloud and we can additionally remove the data.
What is the Back-up Device?
The first thing you ought to recognize is that there are 3 variations of the conserved video game data
- The original version is kept in the folder of AppData (D1).
- The cloud version is stored in the location Steam/userdata/SteamID/ AppID (D2).
- The cloud variation kept in Vapor’& rsquo; s cloud
servers (D3 ). Do keep in mind the notes (D1, D2, D3) we used as we will be referring to them a great deal in the future.
When you begin the ready the very first time, D1 is produced instantly. After you are done playing the video game, the game information is updated in D1 as well as instantly copied to D2. Hereafter D2 is after that synced to D3, therefore submitting all of your video game material.
If you start your game from one more computer for the first time, if Vapor has D3 on its servers but doesn’& rsquo; t identify D2 on the computer, it will instantly download the information as well as copy D3 to D2. Steam Cloud additionally automatically downloads the absent data whenever you start Vapor.
In short, the most important information for us is D2. If we can manipulate it, we can effectively delete the data which you want to delete.
Note: Some video games wear’& rsquo; t have D1 as well as they straight conserve their data to D2. While some video games don’& rsquo; t usage D2 as a medium as well as publish the data to the Cloud straight from D1.
What Are the Userdata Material?
In the directory site Steam/userdata, you ought to have a folder representing your SteamID (You inspect what your Heavy steam ID is by reading our post on it). After you open it, there will folders made for each video game that you play. They will certainly be determined utilizing their AppID (AppID can be quickly inspected by going to the video game in the Steam shop as well as extracting it from the link). In this video game folder, you will certainly locate 2 entities.
- remotecache.vdf: This file explains all the properties of documents that are consisted of in the remote folder.
- Remotefolder. This consists of all the documents which are synced with your Vapor Cloud server.
Deleting Information from Cloud
In this method, we will certainly be adhering to 2 important steps. We will first bring up the Steam Cloud conflict notice and afterwards erase the Cloud files.
Do note that you would certainly have to follow these actions video game by video game to erase every one of the Steam cloud content.
Initially, we require to delete the AppID folder from your Heavy steam directory. After you restart your computer system and also Steam, Steam will immediately re-create the folder. We need to execute this step to ensure that the Vapor Cloud is working flawlessly as well as we can go on with the part of removal.
- Open your Steam directory site. The default area for your Heavy steam setup is
- Search for a folder of AppID as well as Erase it. After that restart your computer as well as Heavy steam. Beginning a game for a couple of mins. Ensure that you have a working net connection.
- Browse back to the Heavy steam directory and also examine if the AppID folder is back. If it is, it is confirmed that your Heavy steam Cloud is functioning flawlessly and we can wage the method.
Raising Vapor Cloud Problem Discussion
The very first component of the service is probably one of the most difficult. To erase all your Vapor Cloud data, it is required to bring the conflict discussion. Without it is not possible to remove the information present in your Cloud. Vapor Cloud dispute occurs when the Cloud data vary from the data offer on your hard drive.

There are 2 approaches to bring about this conflict:
Technique 1:
- Ensure that your Steam Cloud is enabled by following the steps discussed over. Exit Vapor totally by finishing all the processes beginning with Steamclientbootstrapper making use of the task manager.
- Now will alter all the data in the area
The objective is to make certain that all the files are various from those submitted to the Heavy steam cloud. We can’& rsquo; t merely delete the files from this area as Heavy steam will immediately see that the documents are missing as well as download the very same ones from the Cloud web servers. We can achieve our job by damaging them and also making them 0-byte files.
- Navigate to
- Currently hold shift as well as right-click on your remote folder. Select the alternative “& ldquo; Open PowerShell home window”right here & rdquo;. Open Up PowerShell Home Window Right Here You can additionally open up PowerShell when in the folder by clicking the Data choice existing at the top left side of the display and selecting “& ldquo; Open up Windows PowerShell as administrator & rdquo;. Open Up Windows PowerShell as manager
- Once PowerShell is opened, kind the specific message created listed below
If you fall short to compose the appropriate code, you will get an error such as this
Mistake if Code is Not Right
If you properly enter the line there will certainly be no confirmatory message and also you will obtain a home window similar to this.
No Message After Implementation of the Code
Start your Heavy steam and also there will certainly be the dispute home windows existing on your Steam client.
Approach 2:
This is a less complicated approach as compared to the earlier one yet it isn’& rsquo; t that reliable.
- Open your Heavy steam client. Open its Setups by pressing the Vapor button existing on top left edge of the home window as well as picking the choice.
- Open the Cloud tab existing on the left side of the screen. Uncheck the alternative “& ldquo; Enable Vapor Cloud synchronization for the applications which sustain it”& rdquo;. Uncheck the Option of Enable Heavy steam Cloud synchronization for the applications which sustain it
- Currently navigate to your Stream directory as you did earlier as well as remove all files present in the folder of AppID. The file course for deletion is
Now a Steam dispute dialogue will come forth and we can proceed with the staying technique.
Removing Cloud documents
As soon as the Cloud dispute error is forth, put on’& rsquo; t click any option as well as adhere to the instructions listed below.
-
Browse to the following file course
as well as delete all the documents in it. There will be two documents (remote folder as well as remotecache.vdf). Erase both of them.
Remove Remote Folder as well as RemoteCache.vdf
- Currently go back to the dispute window and also choose the alternative of “& ldquo; Upload to the Heavy Steam Cloud”& rdquo;. Currently Vapor will sync your AppID folder while there will certainly be nothing in it and the previous data on your Steam Cloud will be deleted. Publish to the Vapor Cloud
- Now the game will certainly begin instantly yet it will certainly create brand-new documents that will be synced to your Heavy steam cloud when you close it. We can prevent it from occurring by pushing alt + tab. This will open up the open windows on your screen. Select the Steam customer from the list of windows. Vapor will Open up With the New Game
- Once you remain in the Vapor customer, open up the customer’& rsquo; s Setups. Navigate to the Cloud tab and also uncheck the line which makes it possible for cloud. Examine the Choice of Enable Vapor Cloud synchronization for the applications which sustain it
- Currently return to the game and also exit. No documents will be synced to your Steam cloud.
How to Ensure If it Worked?
Bear in mind how we inspected at the beginning of this approach if the Steam Cloud was running as anticipated by erasing the AppID folder as well as checking if it was made once again. If there is no documents existing in the Heavy steam cloud, there will certainly be no file downloaded to your computer.
- Enable the Vapor cloud as we did in the guide.
- Leave Vapor completely by using the task manager.
- Remove the AppID folder (if you didn’& rsquo; t symphonious 2)
- . Currently check D3 (these are the cloud data) and contrast them with D2 (local documents on your computer system). If there is absolutely nothing in D3, there will certainly be nothing in D2 too!
- Examine the following directory SteamuserdataSteamID
No new AppID folder would certainly have been produced.
You can likewise examine by logging Heavy steam in on an additional computer system and also checking if the files exist.
If you make it till here with no problems, you have effectively erased all the files on your Vapor Cloud.

Just How to Erase Heavy Steam Cloud Conserves from OS X
The treatments above can also be replicated on OS X as well as older Macs to a slight level. By complying with the steps below, you will certainly be able to erase your neighborhood saves. You can after that disable the Heavy steam Cloud synchronization from the Vapor application, start a new game and also create a few new conserves. After that, when you return to re-enable the Steam Cloud synchronization features, the customer will certainly ask you which conserves do you intend to use. You can after that choose the brand-new ones which will certainly erase and also change your old saves from the cloud.
To make points even clearer, right here’& rsquo; s a detailed guide through the entire thing:
- Open your Heavy steam application and also most likely to Steam > > Settings through the bow at the top of the window.
- In the settings food selection, click on the Cloud tab and also uncheck the box associated with Enable Vapor Cloud synchronization for applications that support it. Uncheck the Option of Enable Vapor Cloud synchronization for the applications which support it
- Close Vapor entirely and open your Finder application.
- Most likely to Collection > > Application Support > > Steam > SteamApps > Usual and also open the folder of whichever video game you want to erase the save documents.
- Next, open the SAVE folder to expose the conserves of the game.
Note: If the area defined over doesn’& rsquo; t land you to the conserve files, attempt the complying with locations but mind the placeholders:
- When you handle to identify as well as erase the neighborhood conserves from the game you’& rsquo; re targeting, open up the Game and produce a few new conserves.
- Departure the game, open vapor as well as return to Steam > > Settings > Cloud. From the cloud tab, re-enable the checkbox beside Enable Vapor Cloud synchronization for applications which sustain it and also click the okay button below.
- Heavy steam will ask you whether you wish to utilize the freshly created regional saves or the ones that you currently have on the cloud. Choosing to use the brand-new ones will certainly delete the old saves that you presently carry Steam Cloud. Remove Your Cloud Saves & & Replace with Your Regional PC Data